Building native apps is an expensive endeavor; that’s why many teams and clients turn to libraries like Cordova that allow you to write code once and run it on both iOS and Android. But sometimes you need native iOS capabilities, like a Share Extension or an Intents Extension for Siri. In that case you might think that your only option is native. However, if you are extending an existing Cordova app you can still add these capabilities through a custom plugin.
The process is not straightforward though; iOS app extensions are different build targets from your main app. That’s so iOS can run them when needed with minimal overhead. They have a different Info.plist from your main app to contain the settings that only pertain to them. Cordova doesn’t expect additional build targets, but it is possible to get it to play along by following the steps below. This process can be used to incorporate any app extension.
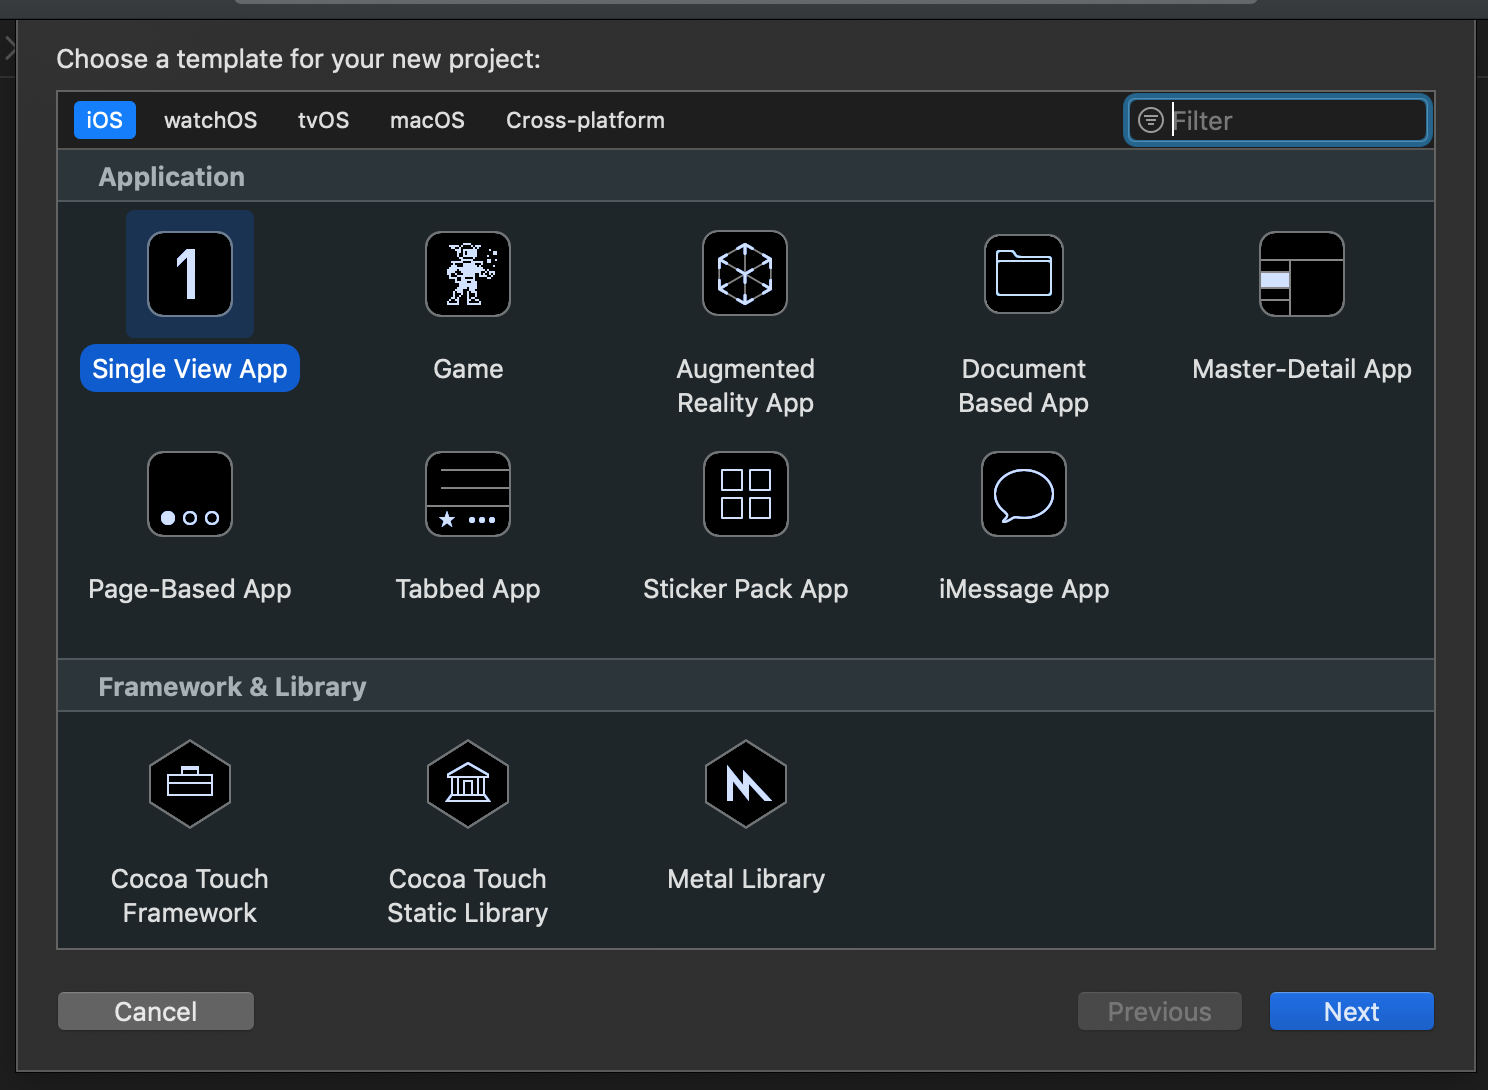
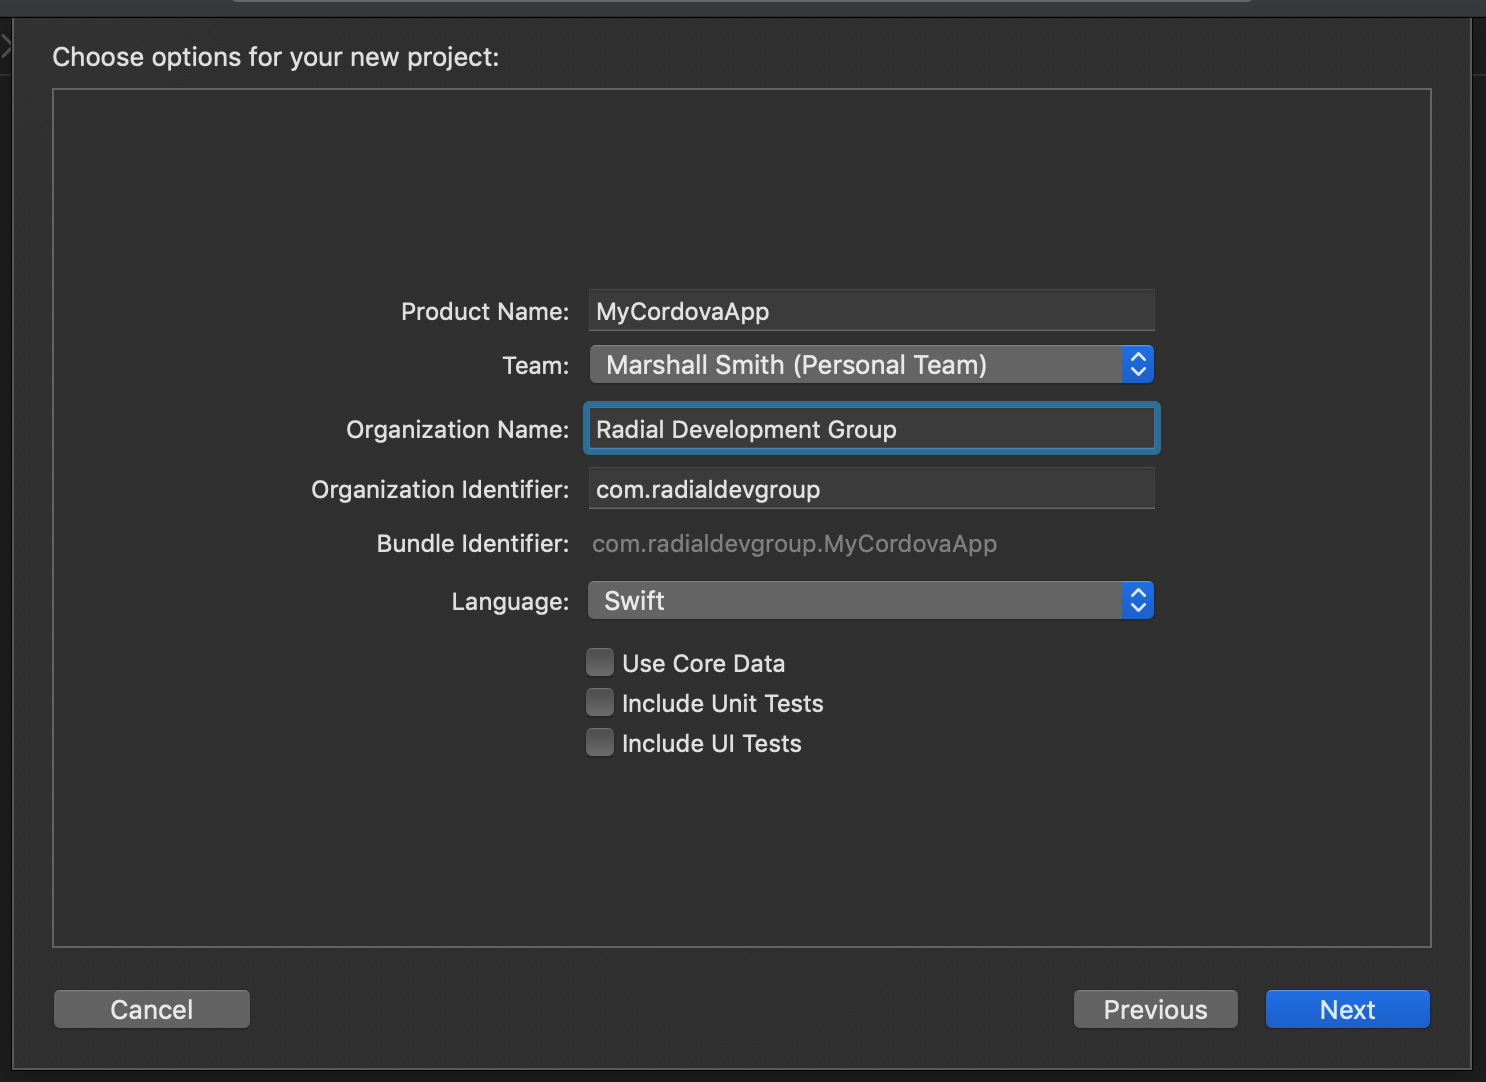
Step 1: Create a new project
Open Xcode and create a new project. You may want to put this project in its own folder in your main repo so you can commit it. You should also be careful to use the same name and organization identifier as your main project. Note that you would want to be very careful not to commit your platforms/ directory because every time Cordova makes changes you wind up with an inscrutable diff.
Step 2: Add the extension
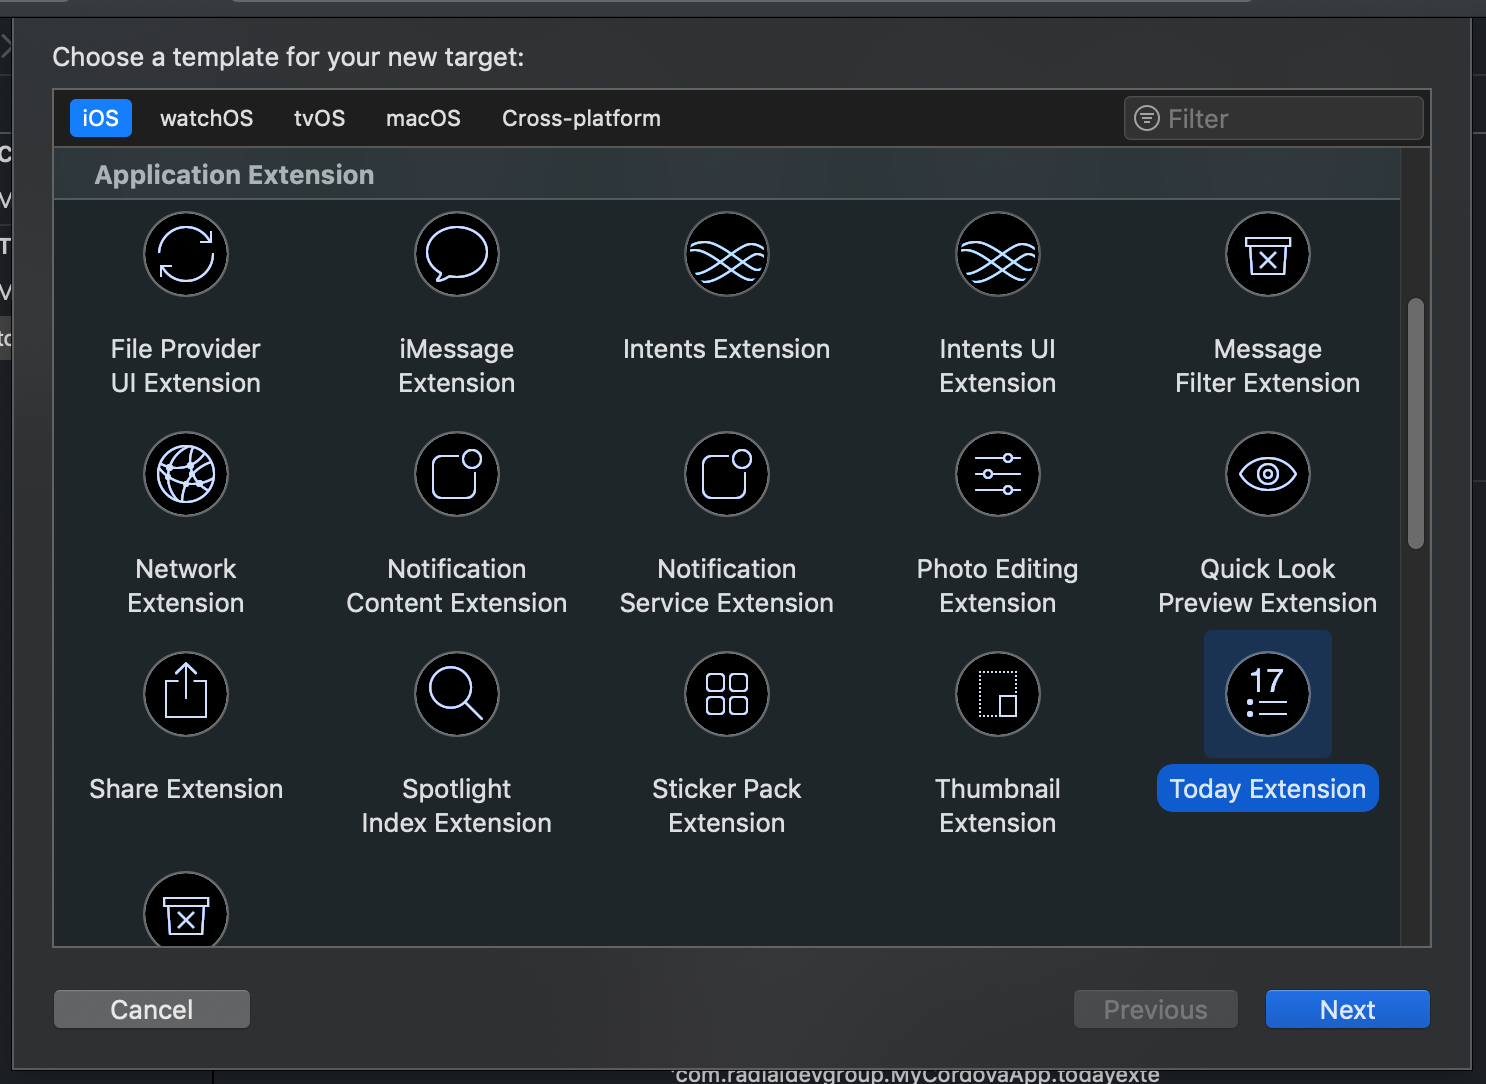
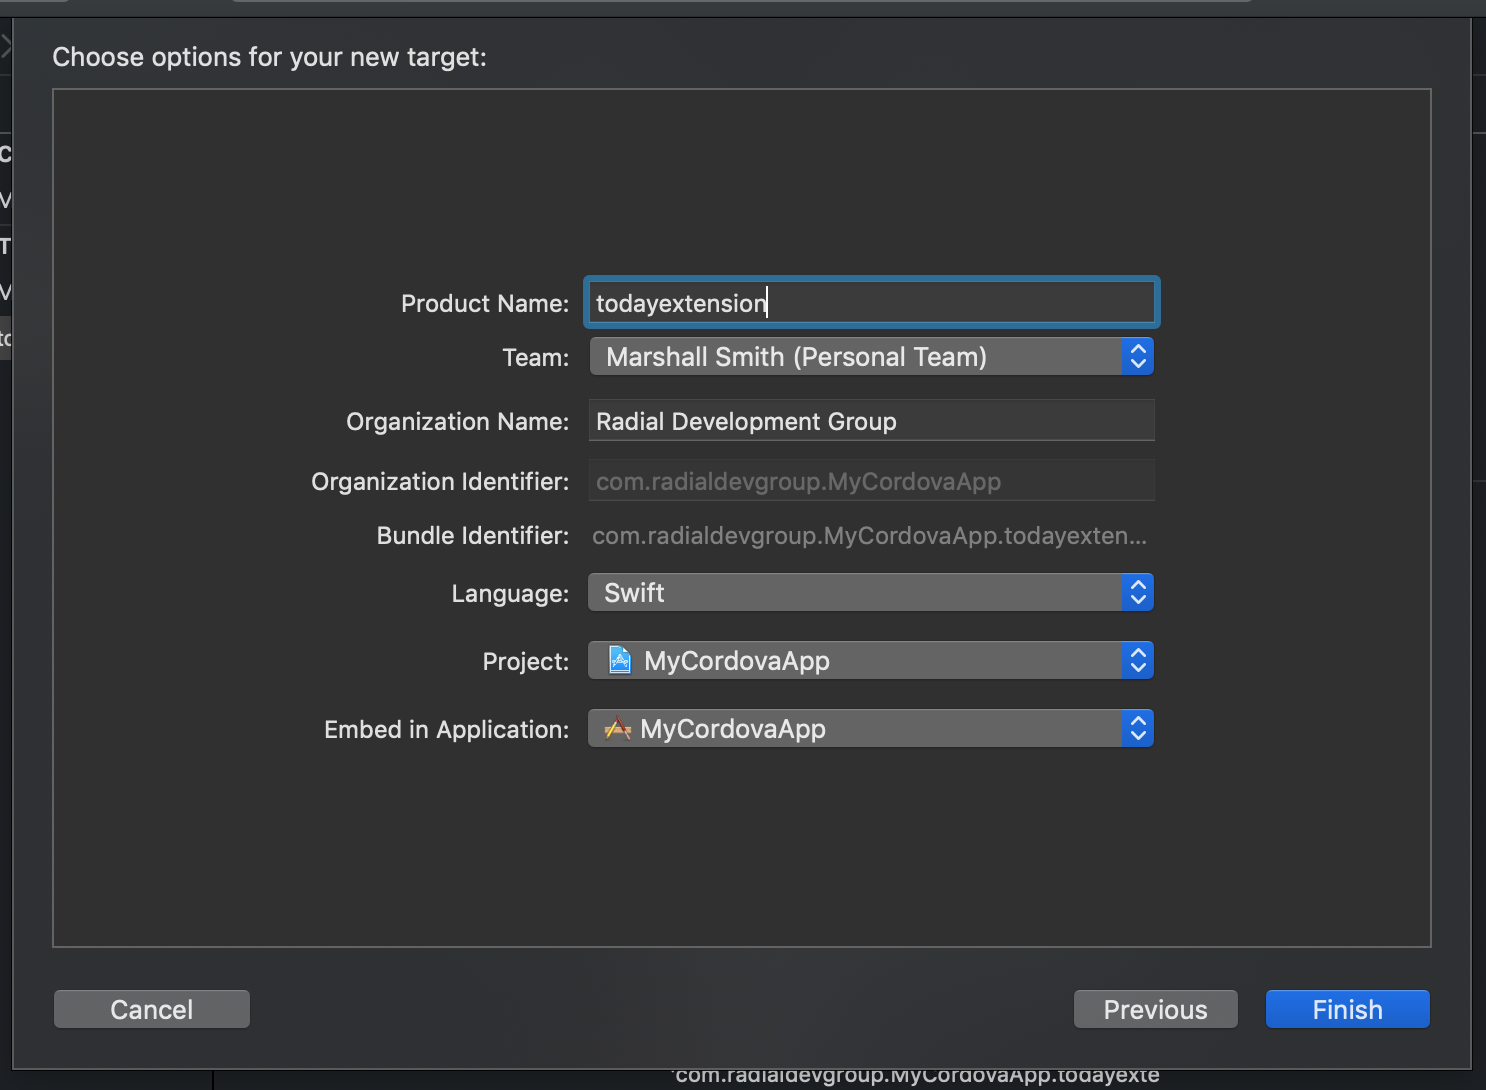
In Xcode, click File > New > Target… then choose the extension you want and click next. You’ll want to make sure all the team/organization information is correct and use a similar bundle id to your main app. For example, if your main app’s bundle id is com.yourname.app you might have com.yourname.app.shareextension.
Step 3: Delete the other app target
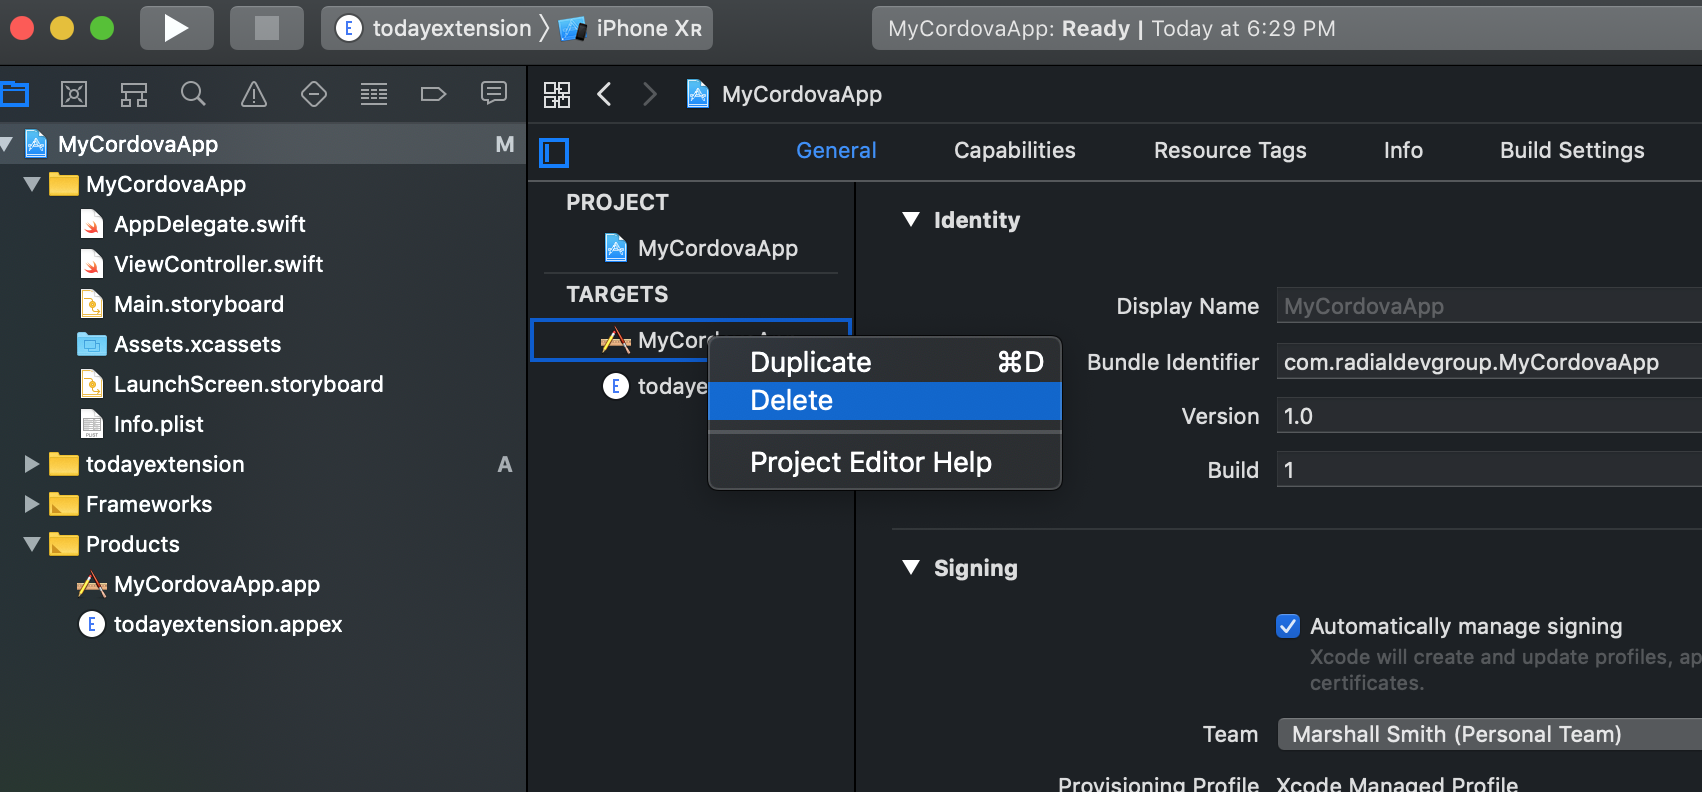
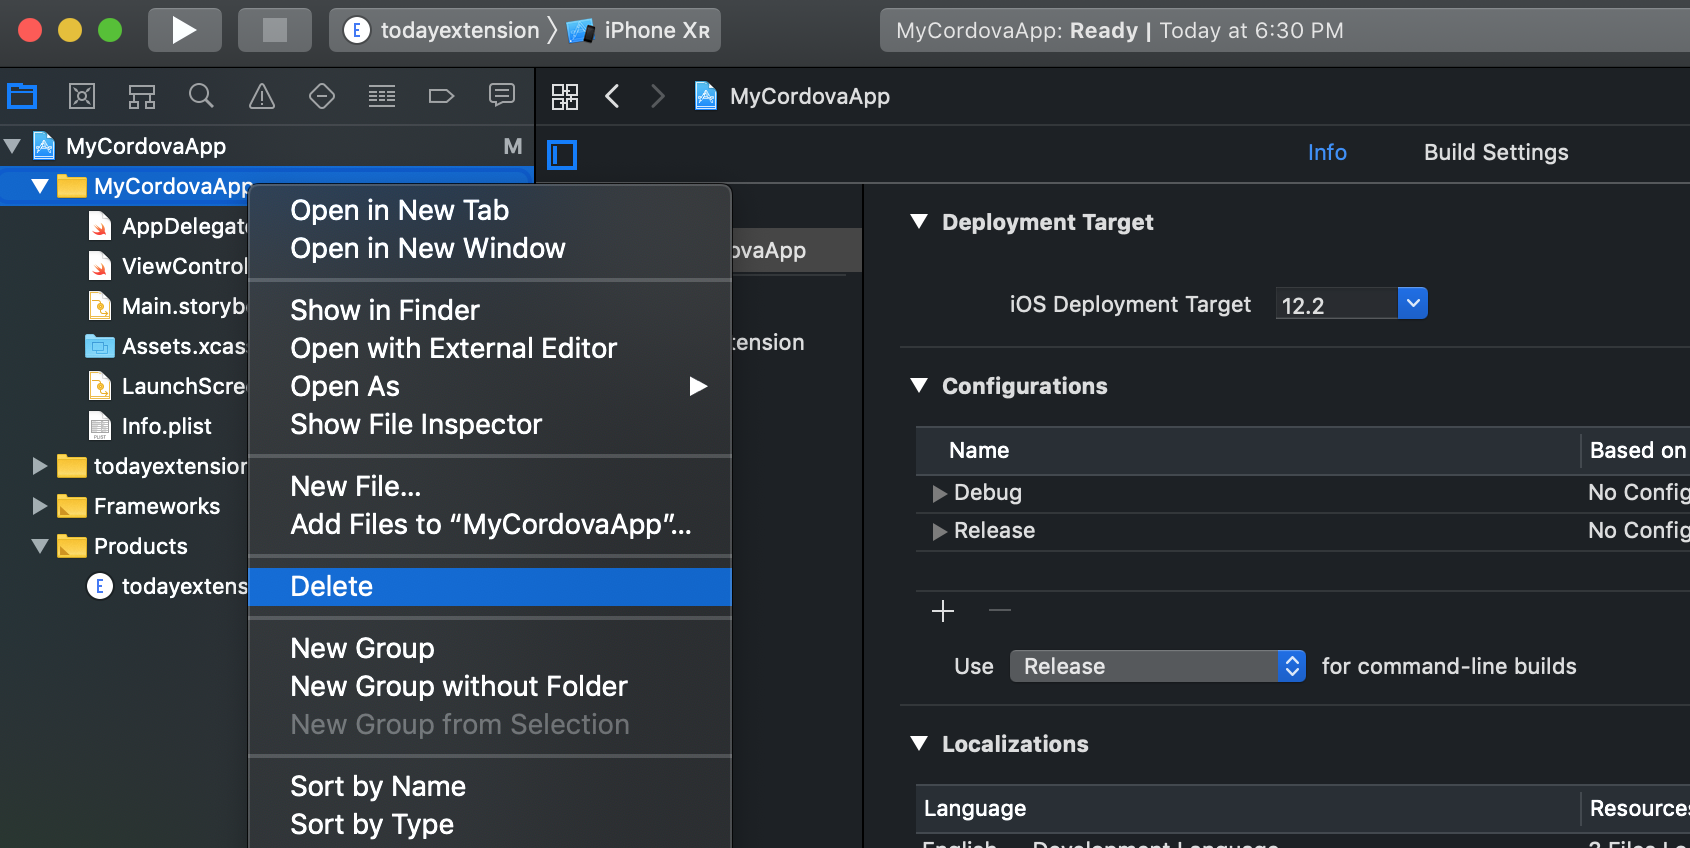
You don’t need the blank app target that you got when you created the project, so in the top level project, right click on it (under “Targets”), right click, and delete it. Then you can delete the folder of the same name.
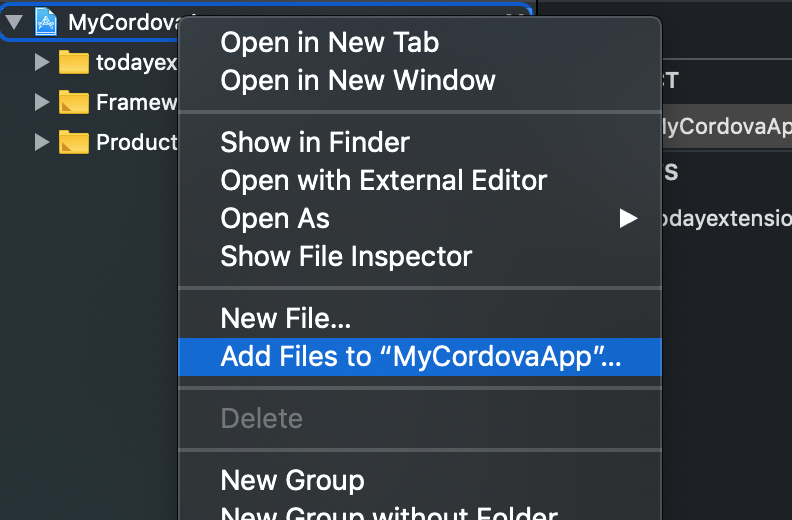
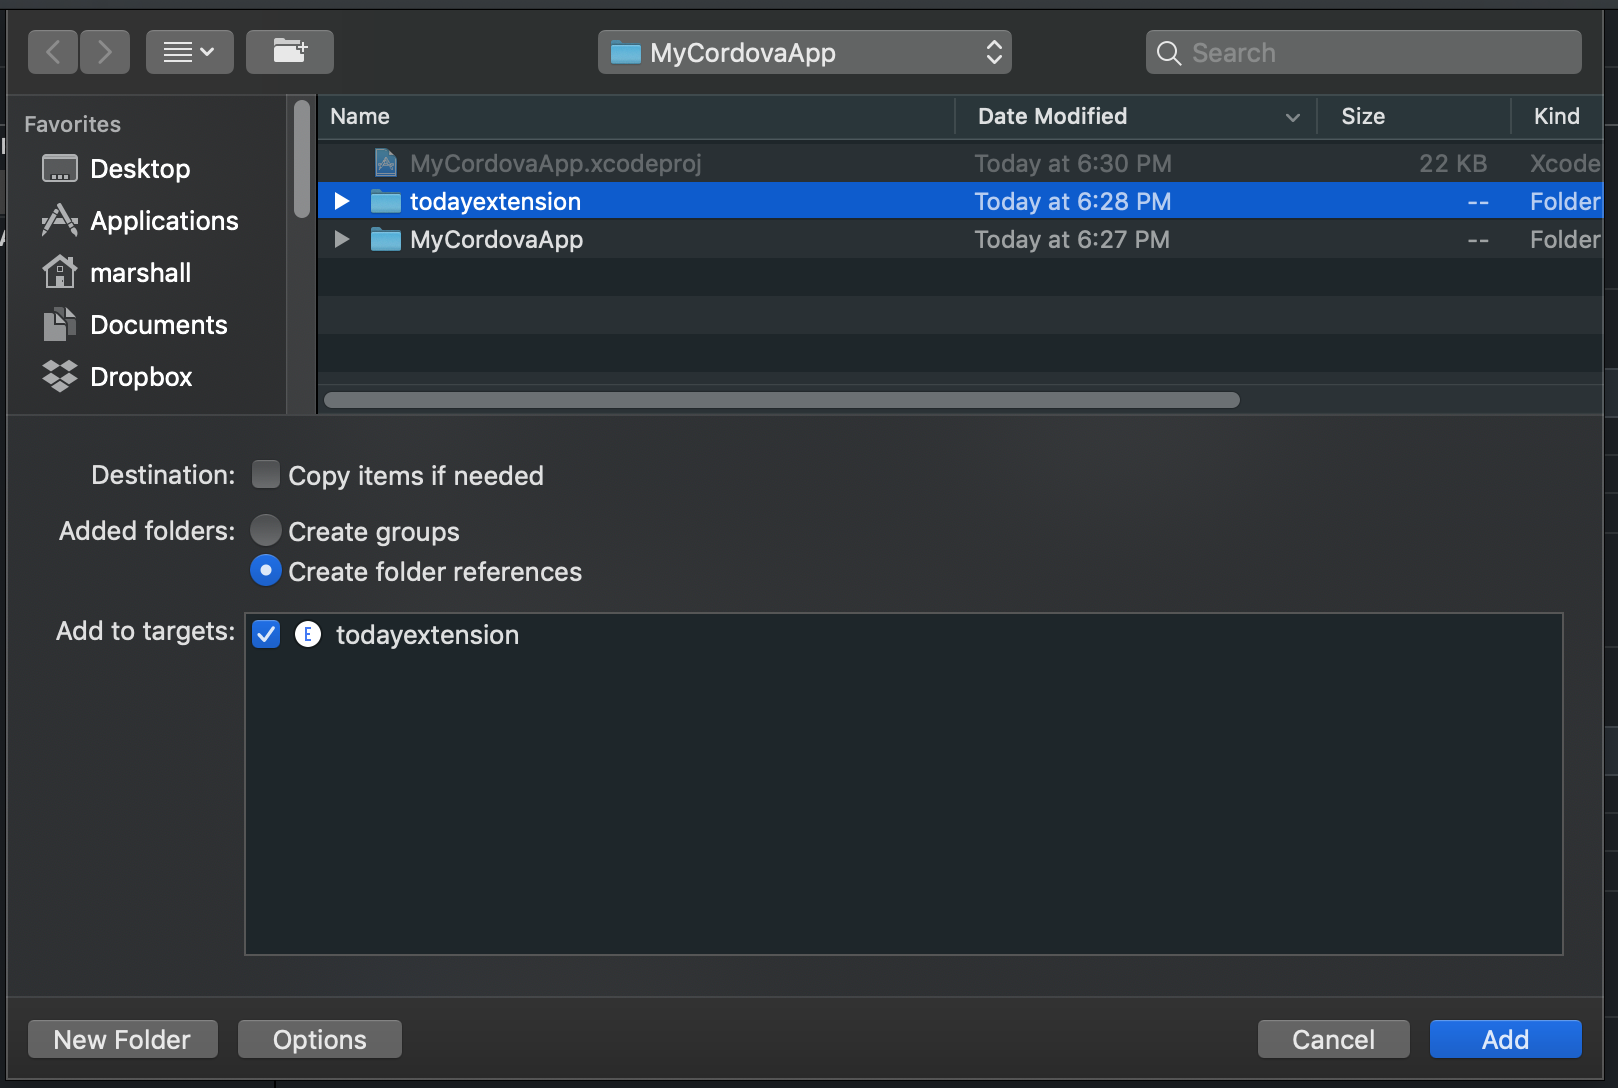
Step 4: Add project as a subproject of your main app
Open your main project in Xcode and right click your project, then click “Add files to
At this point, you should be able to build and test your project with Xcode.
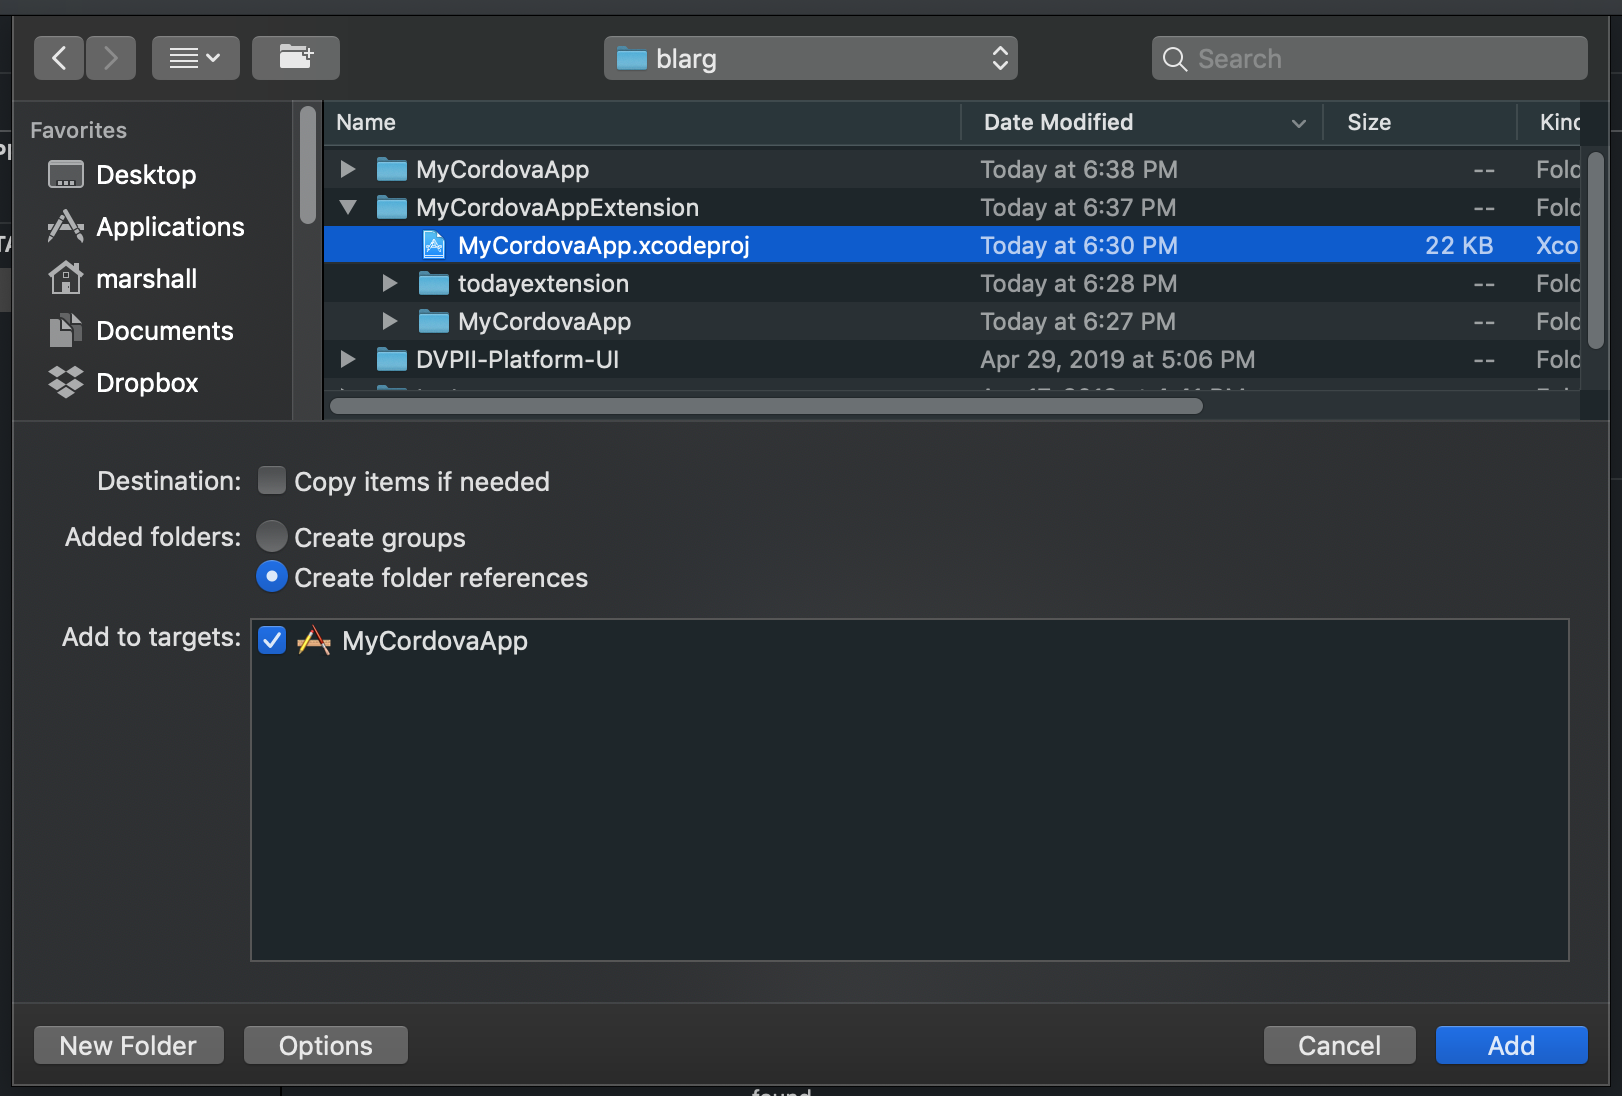
Step 5: Automation

Everything is great until you need to regenerate your Cordova project for some reason. Maybe you are setting it up on a new computer, maybe you are installing a plugin, or maybe you just feel the need to rm -rf platforms and start fresh. Now the trick is to automate step 4 so you don’t have to manually repeat it every time.
Start by creating a Cordova plugin to contain your extension Xcode project (move it into extension-name/src/ios). Cordova plugins give you the ability to specify hooks that can run as part of the install/uninstall. It’s easier to break automation into two parts: 1: copying the necessary files, and 2: modifying the Xcode project settings.
For Part 1, add your hooks to the plugin.xml:
    <platform name="ios">

        ...

        <hook type="before_plugin_install" src="hooks/iosCopyAppExtension.js" />

        <hook type="before_plugin_uninstall" src="hooks/iosRemoveAppExtension.js" />

    </platform>
And create the referenced javascript files. Note that providing an uninstall hook is good practice so that if you ever need to update the version or build a debug version without your extension you don’t have irrelevant or erroneous files hanging around.
Each javascript file should have a module.exports function that will do the required work. See this guide for examples). You can use Node’s fs and path packages to locate the correct folder and do the recursive copy (it should wind up in platforms/ios/).
Part 2 is the trickiest due to the complications of the .xcodeproj format. Fortunately, Cordova has a library for altering the Xcode project file. As before, we will start by adding install/uninstall hooks:
    <platform name="ios">

        ...

        <hook type="before_plugin_install" src="hooks/iosCopyAppExtension.js" />

        <hook type="before_plugin_uninstall" src="hooks/iosRemoveAppExtension.js" />

        <hook type="before_plugin_install" src="hooks/iosAddTarget.js" />

        <hook type="before_plugin_uninstall" src="hooks/iosRemoveTarget.js" />

    </platform>
The exported function in the referenced hook files will be called with a context object. The parsing library is located at context.opts.cordova.project.parseProjectFile and is an instance of https://www.npmjs.com/package/xcode
This line will parse the project file and give you an object representation that you can manipulate:
pbxProject = context.opts.cordova.project.parseProjectFile(context.opts.projectRoot).xcode;
After that, your goal is to programmatically make the same changes to the project file that the manual process made. We found it helpful to save a copy of the xcodeproj before adding the extension project and diff it against a copy after. This also gave us a way of “resetting” the .xcodeproj so we could do a test run of our installer (and then diff the result against the hoped for result).
Unfortunately, Xcode project files are very complex so this can be a bit tedious to sift through. They also have some very confusing terminology. We found it helpful to keep in mind that:
-
ExtensionContainerItemProxy represents the embedded project
-
PBXReferenceProxy is a built product (the app extension itself)
The other thing that we discovered is that comments are not optional in Xcode project files. You can set them by adding _comment to the corresponding key (so ProductGroup would have a ProductGroup_comment).
Good luck!
